
Playing PlayStation Games using POPS UNDER CONSTRUCTION
One option for playing PlayStation games that may be more convenient than playing on original hardware is using Sony's official PlayStation emulator POPS. POPS is available for PS2, PS3, PSP, Vita and PSTV. This offers highly compatible PSX emulation on a range of Sony consoles with little fuss. POPS also offers a variety of scaling options, bilinear filtering, and disc speed settings similar to a PS2 that make POPS a very enticing way to play PSX games. The PS3, PSP, Vita and PSTV versions are especially convenient and worth considering as your primary means of playing and recording PSX games. Unfortunately, the PS2 version has limited usefulness due to low compatibility and performance, but can be booted via POPStarter for those interested in trying it out.
POPS on PSP
POPS was officially supported on the PSP, and served as the emulator for Sony's PSone Classics program. This program offer a fairly large library of games with the typical POPS enhancement options. With custom firmware, these options are expanded to include nearly every official and unofficial PSX release, homebrew plugins such as configurable controller deadzones or the ability to read GameFAQs txt files while in-game, and a variety of game mods and fan translations.
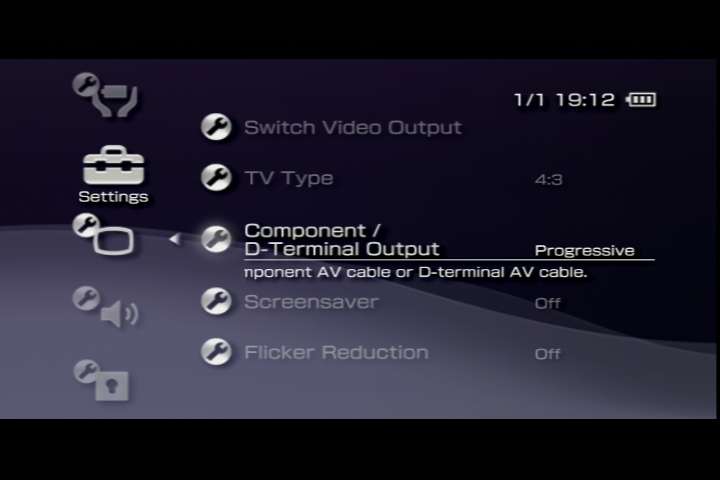
POPS on the PSP offers a variety of options that can be used in tandem with your of choice to capture native 15kHz video. This is especially useful if you're interested in displaying your footage on a CRT, which will work seamlessly with the odd 720x240p resolution, while capture cards, scalers, and modern displays may struggle to achieve an ideal image. In order to achieve this native 240p, you must set the "Component/D-Terminal Output" setting to Interlace under the Connected Display settings in the XMB. While the "Progressive" option (which natively displays at 720x480p) may seem tempting, it exhibits a noticeable amount of softness that may users may not prefer. See the comparison images below for examples.
Other options, such as aspect ratio, may or may not be useful depending on your display. Unfortunately, the PSP exhibits sync drop behavior when games swap between 240p and 480i, just as a original PlayStation would, both on Interlaced and Progressive modes (though Progressive mode may be less disruptive, as it was on my Datapath E1, used for capture).
POPS is also impressively low-lag on the PSP, measuring in at around 1 frame (16ms) of lag. Another benefit of using POPS on the PSP to capture or play PlayStation games is the ability to use a DualShock 3 natively with a PSP Go, making for a very small, wireless (sans the component cable), and portable, PS1 setup.
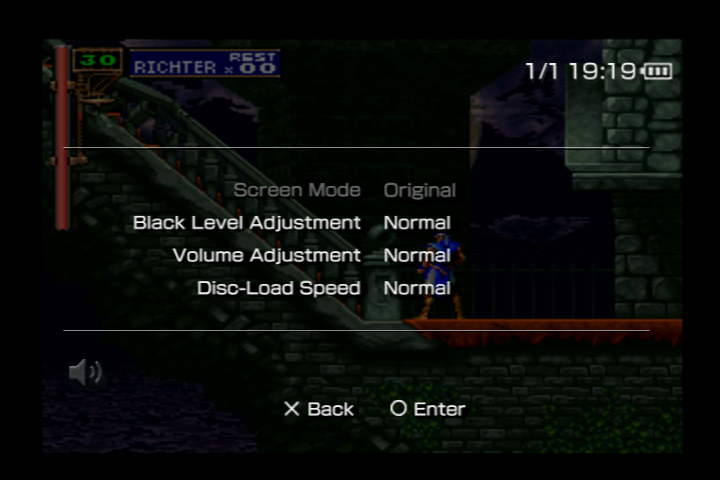
The PSP disables Screen Mode settings when in Connected Display mode
PSP Video Options Comparisons
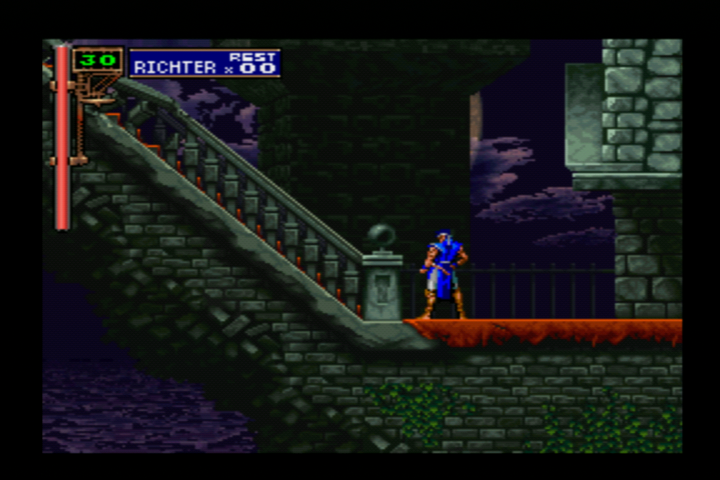
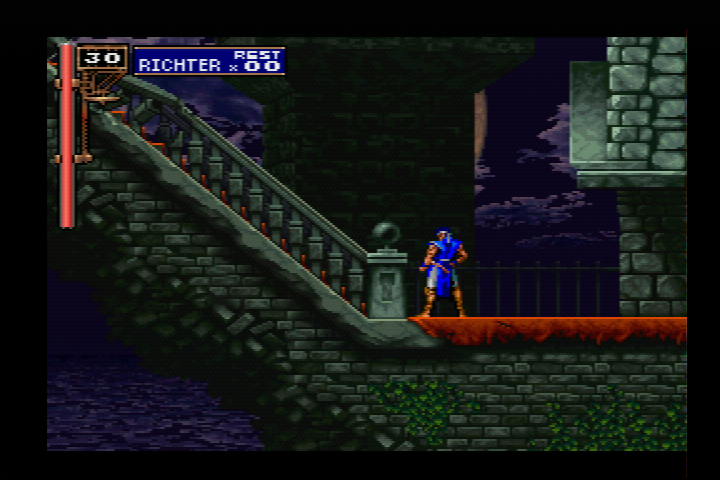
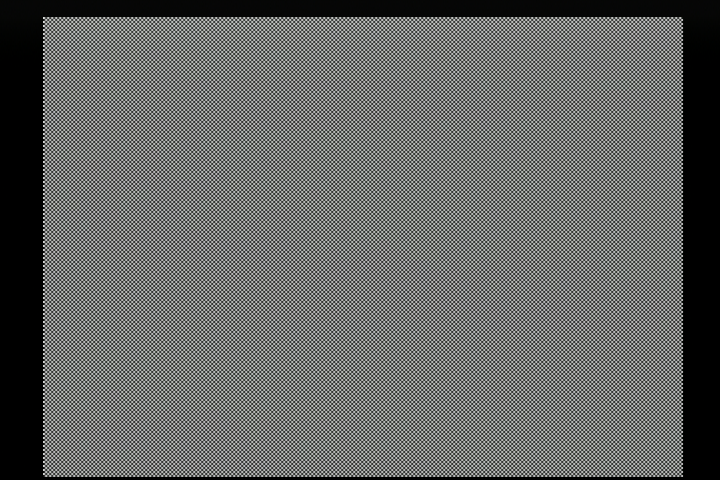
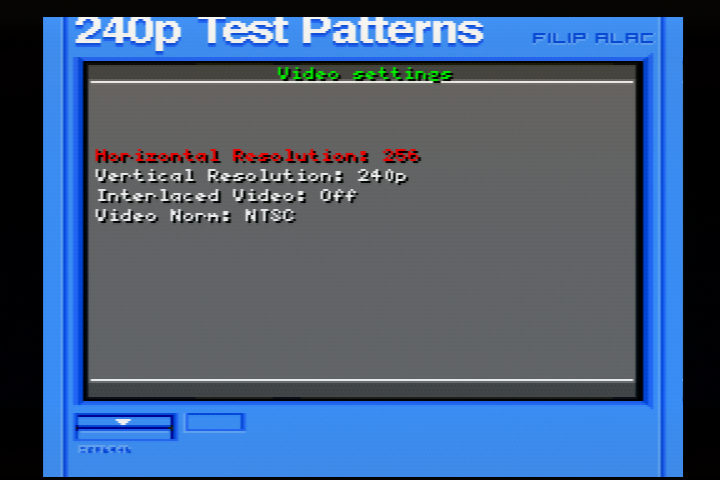
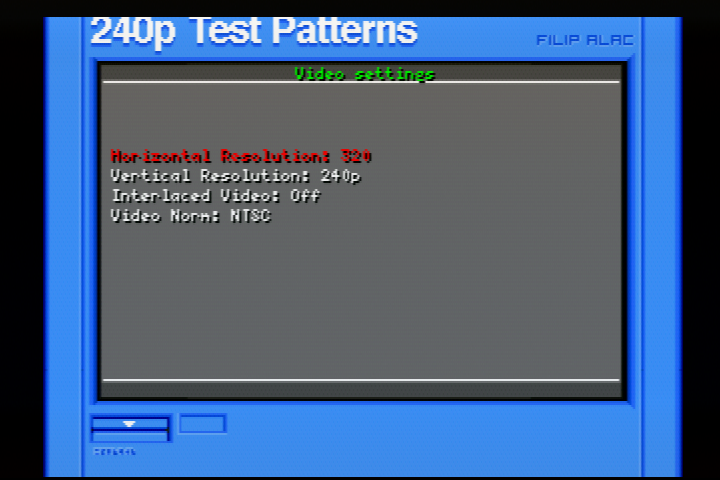
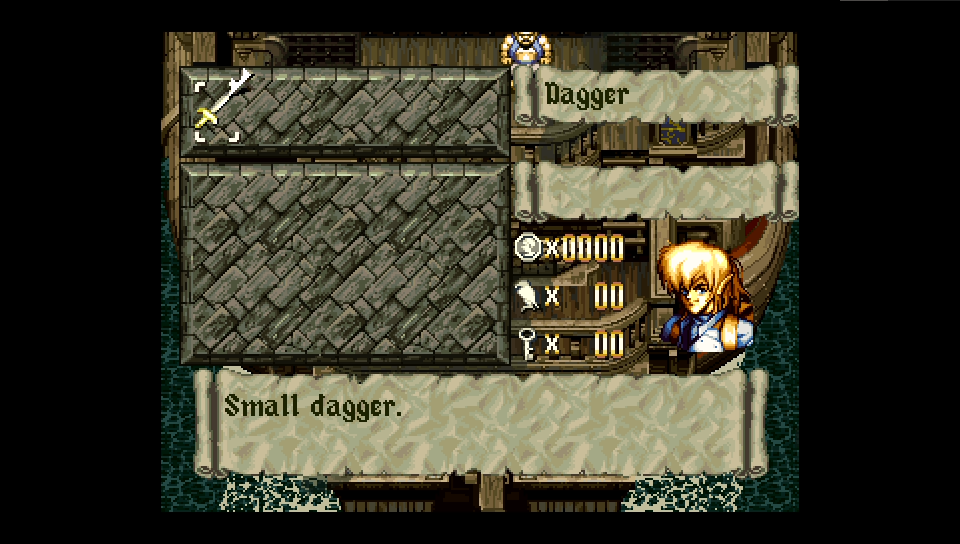
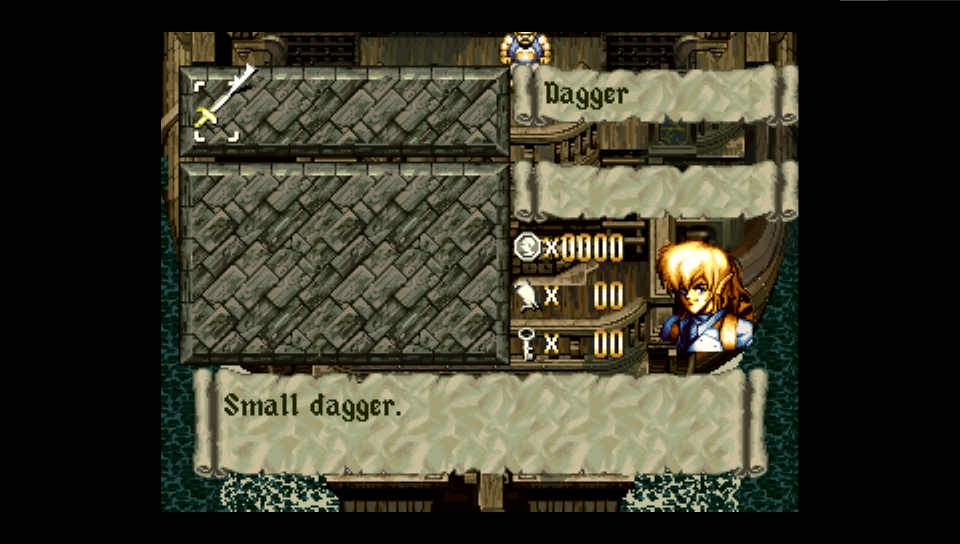
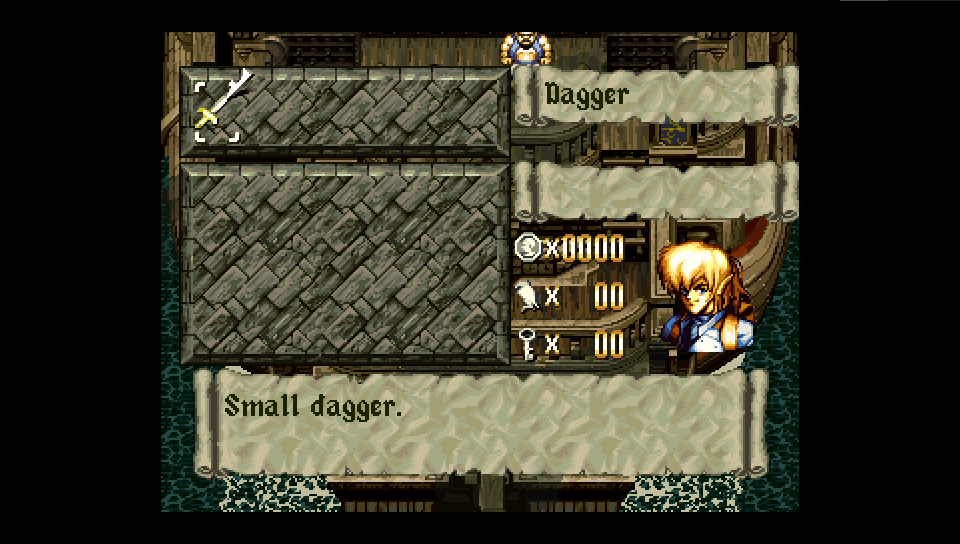
Depending on your chain, you may achieve lesser or superior image quality, the purpose here is to show basic settings options, rather than to show an optimized capture setup. Regardless of your set up, the PSP will display an approximately 4:3 image with slightly different active region depending on the game, with no Screen Mode options other than 'original' being available. The table below shows comparisons between Interlaced (15kHz) and Progressive (31kHz) outputs, as well as the 4:3 scaling in both 256x240 and 320x240 resolutions.
| Setting | Example 1 | Example 2 |
|---|---|---|
| Progressive Output | In-Game | Checkerboard Pattern |
| Interlaced Output | In-Game | Checkerboard Pattern |
| Resolution | 256 4:3 | 320 4:3 |
The following chain was used to capture the images in this section: PSP 3000 with official component cables > Extron SW6 switch -> OSSC (Default settings; Not using PSP optimized mode, as this is meant for native PSP titles) > Datapath E1.
POPS on Vita and PSTV
POPS on the Vita and PSTV is supported due to native PSP emulation, using a mix of hardware and software emulation techniques. Because of the shared hardware, PSP emulation on the Vita and PSTV is mostly seamless with officially released PSP and PSX games alike being bootable from the Vita homescreen without need for further configuration. Official PSX releases on the Vita are mostly shared with those on the PSP and PS3, though there are inconsistencies that may lead to some games being unavailable, or limitedly available across regions. Fortunately, the use of Custom Firmware gives the Vita and PSTV expanded rendering options compared to the PSP and PS3, as well as expanding the range of games (and homebrew) available.
The Vita and PSTV aren't without their drawbacks, however. While the PSP can use POPSLoader to circumvent regressions on different versions of the emulator, the Vita is limited to the version of POPS included with official firmware 6.61. There are methods to get around this restriction, but your mileage may vary. Further, crude testing using the 240p Test Suite* reveals approximately 45-50ms, or 2.5-3 frames, of input lag on a Vita using Adrenaline. This amount of input lag is the product of using two layers of emulation (PSP, and POPS), and may vary based on your settings. This needs further testing, but users are encouraged to take this in to account, especially when playing on a high-lag display.
*240p Test Suite will not compile in to an EBoot in PSX2PSP v1.4.2, use v1.3 instead. Do not use "0" or "No" compression, as this will cause a crash.
Official PSX releases on the Vita and PSTV
Official PSone Classics releases, when downloaded to the Vita or PSTV, will appear as a bubble on your main screen. They may include manuals or other information as options on the PSone Classics' page above the "Start" button. Once loaded in to POPS and the game begins you may press and hold the PlayStation/Home button to bring up the in-app options menu.
PlayStation VITA POPS Menu
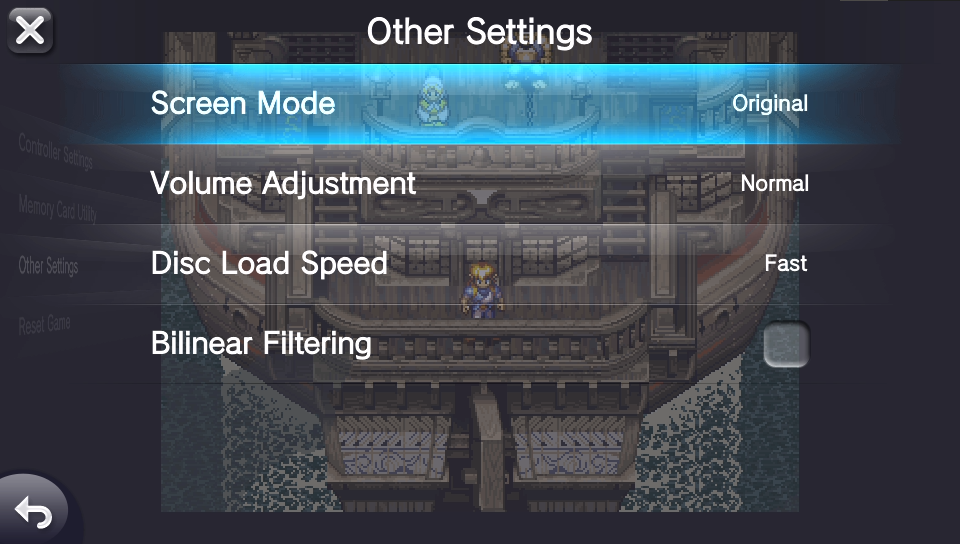
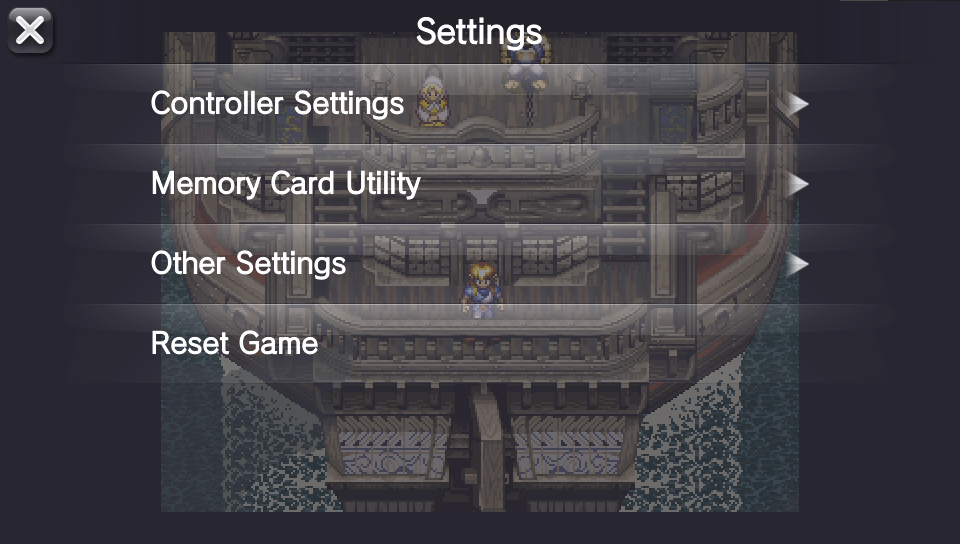
PlayStation VITA POPS 'Other Settings' Menu
By pressing the "Settings" button at the top, you can bring up the POPS option menu, which is very similar to that of the PSP. This offers expanded Controller Settings that supports mapping PlayStation buttons to the Rear and Front touch panels, and choosing between Analog or Digital controls. This can also be used to manage the virtual memory cards, adjust scaling settings, volume, disc loading, or toggle bilinear filtering.
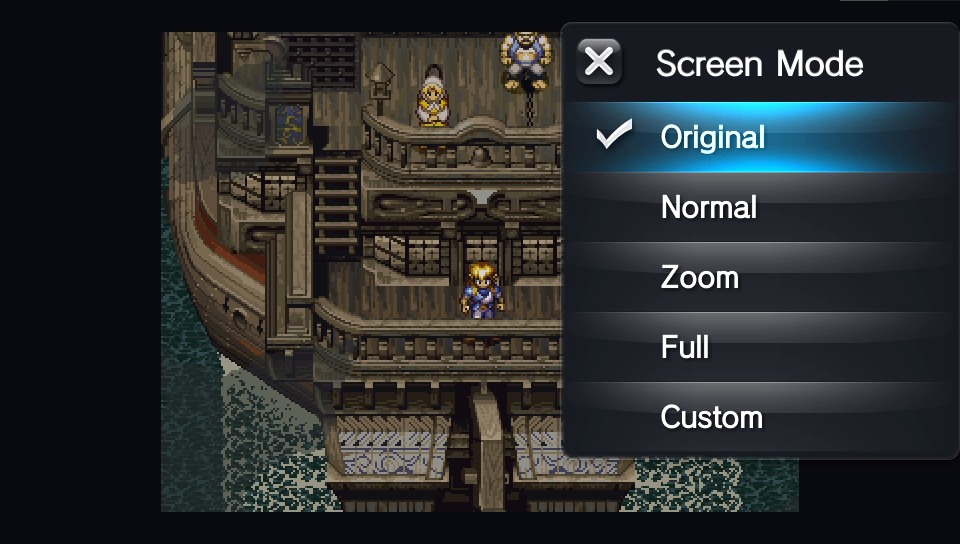
PlayStation VITA POPS Screen Modes
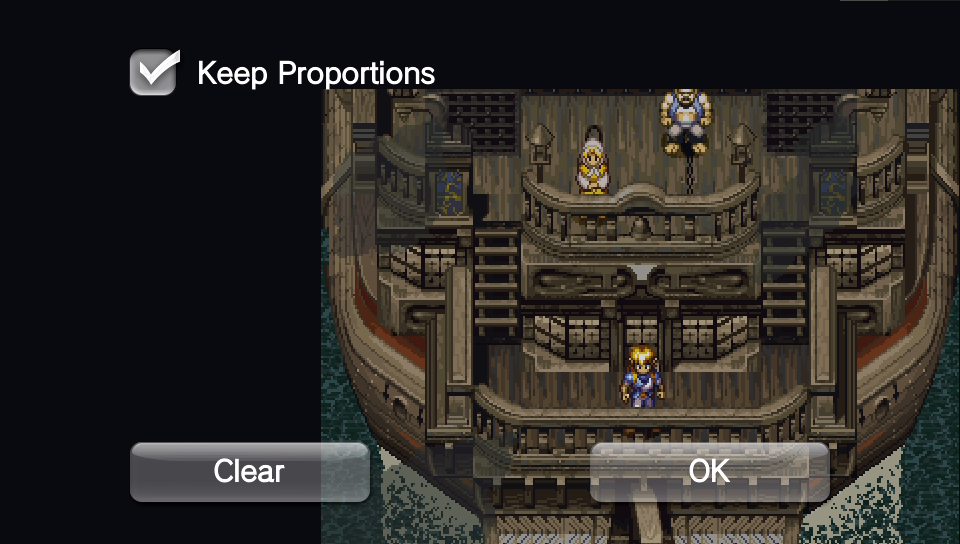
PlayStation VITA POPS Custom Screen Mode, with scaling and screen region options
Using Custom Firmware for PSX on the Vita and PSTV
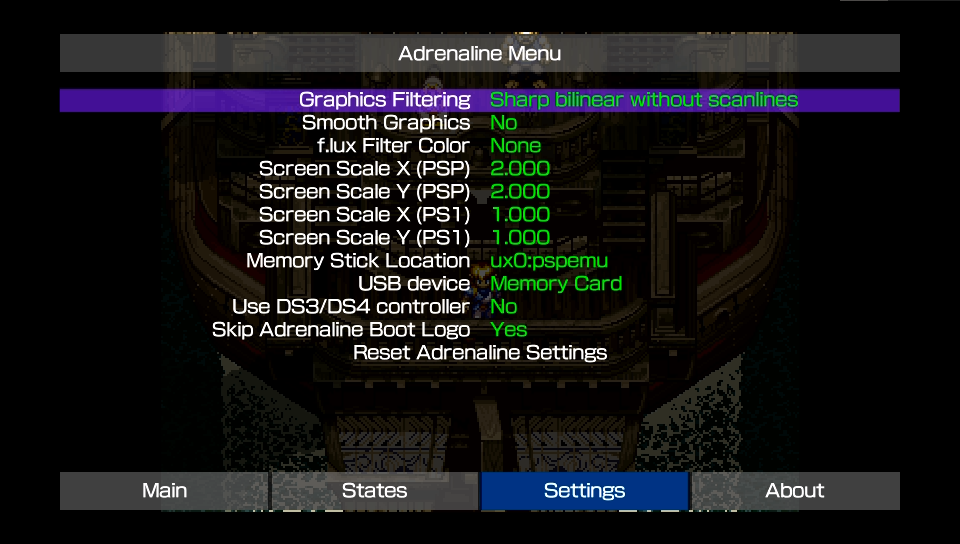
Both of these consoles can be softmodded with Custom Firmware, which enables you to access the PSP sandbox via homebrew program Adrenaline. By installing homebrew, you also gain access to the Sharpscale plugin, which allows you to set system-wide scaling settings for both the Vita and PSTV. Sharpscale gives specific options for POPS, which allows you to run games in their native resolution, swapping on-the-fly to the current resolution (see "The Resolution Conundrum" below for details). Since Adrenaline is a full PSP sandbox, you can also use PSP plugins that are compatible with firmware version 6.61 by installing them just as you would on a normal PSP under the "pspemu" subfolder on your Vita or PSTV. Adrenaline will boot into the PSP XMB just like a real PSP, and will offer an expanded options menu, accessed the same way as the official menu, with options such as an expanded selection of scaling and filtering options, including scanline filters. These options give users surprisingly fine scaling options in order to tune the look of their game and captures without having to tinker in post.
Scaling/Filtering comparison UNDER CONSTRUCTION
Notes:
- Many of these options in the Adrenaline menu are designed to be used across PSP and POPS games, so some may or may not function in POPS specifically. Most notably, with default scaling, Original, Sharp Bilinear Without Scanlines, and Bilinear Graphics Filtering options should all produce an identical image. Smooth Graphics doesn't seem to work with POPS.
- The POPS Bilinear Filtering option will implement a Bilinear filter across the whole image, regardless of if you're scaling, while the Adrenaline option is only to produce a better image when scaling to something other than an integer.
- Sharpscale requires Adrenaline's Graphics Filtering setting to be set to "Original". Unfortunately, Sharpscale does not work well with Xerpi's Vita capture solution, making this difficult to demonstrate.
Regarding POPS Screen Mode options:
- Original - 4:3 (on a PSP 320x240, on a Vita/PSTV/PS3 640x480)
- Normal - 4:3 Fullscreen Pillar Boxed
- Zoom - 4:3 Fullscreen (top and bottom cut off)
- Full - Stretched Fullscreen
- Custom - User-Set size and screen region, with an option to toggle forced 4:3
The Resolution Conundrum:
Unlike many consoles, which either run at a set horizontal width for analogue video (like the SNES/SFC), or conform to a single broadcast standard that games are all scaled to internally (like the more modern PS3), the PlayStation has a handful of resolutions that games run at.
The 240p resolutions are as follows:
- 256: Usually pixel art titles, as well as ports from other consoles that ran at a native 256x240, such as the SNES.
- 320: Very common resolution for native 4:3 Aspect Ratio with square pixels. Used in 2D and 3D games alike from many studios.
- 384: Primary used in ports of Capcom arcade titles, though some other games also make use of it. Sometimes referred to as 368 for reasons unknown.
- 512: The most common 'HiRes' output, mostly used in 3D titles. Exactly double the resolution of 256, which is convenient for sampling.
- 640: The least common resolution, more often used for menus than gameplay. Exactly double the resolution of 320, which is convenient for sampling.
On top of these 240P resolutions, the PlayStation can also output a 480 Interlaced signal at each of these horizontal resolutions. The most common resolutions for 480i seem to be 320, 512, and 640, though 256 and 384 do crop up occasionally.
This diversity in resolution, especially the use of both progressive and interlaced signals, poses significant problems for capture, as well as for some scalers. The most widely known instance of this is the signal drop associated with swapping from 240p to 480i menus in games like Chrono Cross. However, even within the realm of progressive signals, this can pose problems. 256, 320, and 384 each have a different optimal sampling rate in order to achieve pixel-perfect capture, and many games use one or more of these for menus, cutscenes, intro cinematics, and gameplay. In theory, we could use a common multiple, but these require beefy scalers and capture methods for 10x or 15x capture. Maybe one day. Until then, we're forced to choose the resolution that is used most commonly, splice together capture of different resolutions, or use generic non-optimal capture settings and sacrifice sharpness for consistency.
Optimal Timings:
The optimal horizontal sampling rates for each progressive resolution can be found below. These are the optimal sampling settings for the three primary resolutions, keeping in mind that 512 and 640 use the same sampling settings as 256 and 320 respectively
On a PS1, courtesy of the JunkerHQ Wiki.
- 256 - 341.25
- 320 - 426.60
- 384 - 487.50
On a PS2, through our own testing, and only confirmed with an OSSC, which is less precise than some capture solutions.
- 256 - 343.20
- 320 - 429.00
- 384 - 490.00
Game Resolution List:
To aid in helping purists find the best possible resolution to capture their games, we've tested and confirmed the primary gameplay resolutions of many PlayStation games.
Resolution List Thus Far: HERE
Methodology as of now is as follows:
Using pSX emulator, boot up a game, press Tab, and check the 2nd line for resolution information. Play the game until gameplay, pause, record all resolutions after the 640x480i PS1 splash screen which all games share. I've skipped resolutions which only appear during small loads with no splash screen.
Using Xebra emulator, turn off all scaling options, then use trial and error with Width and Height options to find correct resolution for any given scene.
With the OSSC, load the game on to a real PS1 or PS2 console, and cycle through optimal timing profiles until you find the right one. There may be a better way to do this, but I haven't gotten to testing with real hardware just yet. Unfortunate the brief nature of intro cutscenes and such make them difficult to ascertain the resolutions of, but also of much less importance than gameplay and primary menus.
To contribute, Fill out this Form: HERE.
Send issues to SoFisht#8382 in the R3.fyi Discord, or post to the associated Shmups Forum thread.